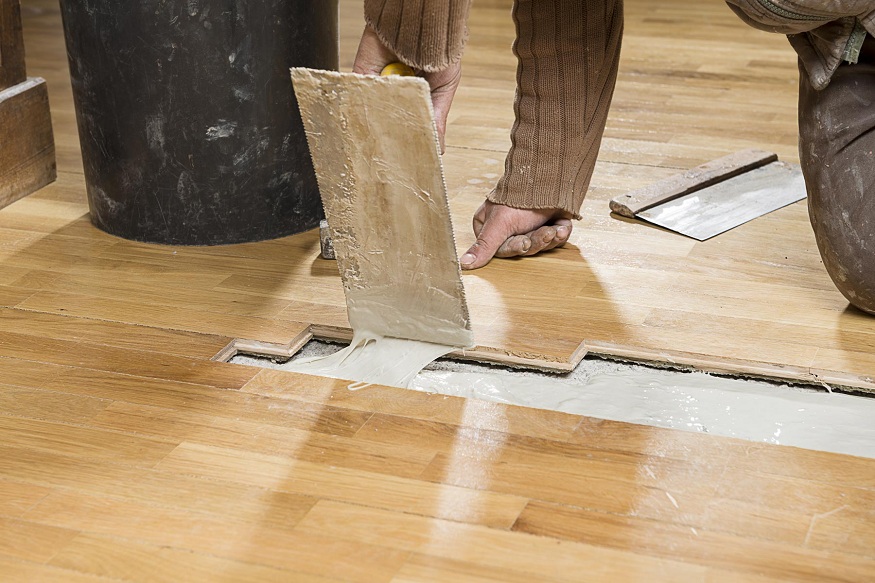
Laminate flooring is cost-effective, available in many colours, and long-lasting. Unfortunately, it’s not damage-proof. Sometimes, a plank gets broken and ruins the look of the flooring. You can fix the damage yourself if it is minimal and repairable. Replacing a damaged laminate plank is quite simple if you’re patient and willing to put some effort into it. Read this post to learn how to replace a damaged plank like an expert.
So if you:
- Are a homeowner;
- Are DIY enthusiasts;
- Want to know more about the replacement process and the tools needed;
Read on to discover how to replace a damaged laminate flooring plank.
When Replacing Is Needed
Replacing laminate flooring planks may be optional if you can repair the damage. There are repair kits available at most flooring stores that include everything you need to cover minor scratches. Unfortunately, some kinds of damage are not repairable, such as:
- When the edges are curled or raised due to moisture.
- There is bending due to water damage.
- There is significant surface wear.
- Deep scratches.
Consider professional floor repair services if you find this task overwhelming or time-consuming. In this way, you will save time, and the result will have a professional touch.
Laminate Plank Replacement Tools
Ensuring all the necessary tools and materials are available before beginning your DIY project is essential. It is necessary to have these tools and materials:
- Laminate planks – purchase the same type and colour as your existing flooring;
- Pry bar – used to remove old planks from their current location;
- Hammer – secures newly installed planks into place;
- Tape measure – an essential household measuring tool. Use it to accurately measure the area before cutting the planks;
- Ruler or chalk line – for marking exact measurements before cutting;
- Utility knife – For cutting new planks into the appropriate size;
Having these tools on hand makes the task simple and easy. You should also wear safety glasses. First and foremost, safety!
How to Safely Change a Damaged Laminate Plank in the Center of Your Floor
It would be best to take all necessary safety precautions before starting to prevent injuries during this process. Wear safety glasses and take other measures to protect yourself from dust particles or debris that may fly up during work.
Fortunately, replacing a broken plank is more convenient and less expensive than replacing the entire floor. If the damaged plank is close to the wall, you can usually take it apart because laminate planks are not attached to the subfloor. When removing a laminate plank in the middle of the hardwood, you should cut it out instead of disassembling the whole floor.
Disassembling The Floor
Each laminate plank has two sides, a tongue and a groove side. Start disassembling a floor from the groove side. Examine the edges of the planks to determine which side of the floorboard is which.
This procedure is most challenging when it comes to removing the first plank. Push down on the surface of the plank and force it lengthwise to unlock the end joints with a grout float or other tool. After removing all the planks in the first row, continue until you reach the damaged one.
Removing a Damaged Plank and Installing New One
Cutting laminate boards from the floor requires carpentry skills and a circular saw. If you need more confidence in your skills, get an expert laminate floor fitter to do the cutting.
You can make your DIY project easy by following these steps:
- You should mark the damaged board and place masking tape around its edges.
- Use a plunge saw to cut off the new board’s groves.
- Make an incision along the length of the plank by using a saw. Keep 10 cm away from the ends. Start at the corners and make four new incisions up the saw line. This step will make removing the plank easier.
- It would help if you made angled incisions at the ends.
- Remove the two cut edges of the board using a chisel.
- After removing the plank, vacuum thoroughly. If you damage the underlay, fix it using tape.
- Remember to measure the width of the gap left behind and mark it for later reference.
- Trim any excess material around the edges with a utility knife or saw blade (depending on how thick your flooring planks are)
- Put glue on the edges of the surrounding planks.
- Place the new laminate plank on the side without glue. Ensure that your new boards fit perfectly into place without any gaps.
- Wait at least a few hours for the glue to dry for best results.
Now that you know how to replace a damaged laminate plank, you can enjoy a beautiful floor for a long time. This simple repair task can improve your home’s aesthetic and functionality.
Damaged Floorboard Near The Edges
The simplest method for replacing planks close to walls is by unlocking the planks. You will need a crowbar and a step-by-step guide to complete the job:
- Find the wall nearest the damaged plank.
- Lift the skirting boards.
- Take apart the planks by unlocking them. It is possible to do this by unplugging the tongue of one plank from the groove next to it.
- Make sure the new plank is the same size as the damaged one.
- Once you install the new plank, lock the planks you removed.
- Finish by resetting the moulding on the wall base.
When To Call Professionals
You can repair your laminate floor if the damage is manageable. Consider hiring a local handyman near you to help if it requires professional skills. A flooring expert can accurately determine the extent of the damage and make the necessary replacement or repair.
Conclusion
Evaluating each step of this process can save time in the long run while avoiding costly mistakes. Replacing damaged laminate planks requires preparation, safety precautions, and attention to detail. You can complete the task professionally by having the right tools and following simple steps.
In many cases, replacing a damaged plank in your flooring is a necessity. Generally, this occurs when a plank is scratched or chipped due to everyday wear and tear. The damage might also be caused by water or by, furniture or pets. With some research and practice, anyone can learn how to replace a damaged plank like a pro—all that’s needed is patience and the right tools!


